Why Image Uploads in Next.js Are More Complicated Than They Look

A few days ago, I was reading an article about image uploads in Next.js.
At first, I thought it would be another guide showing how to create an upload endpoint and save a file somewhere.
Instead, it focused on something I hadn't thought much about before.
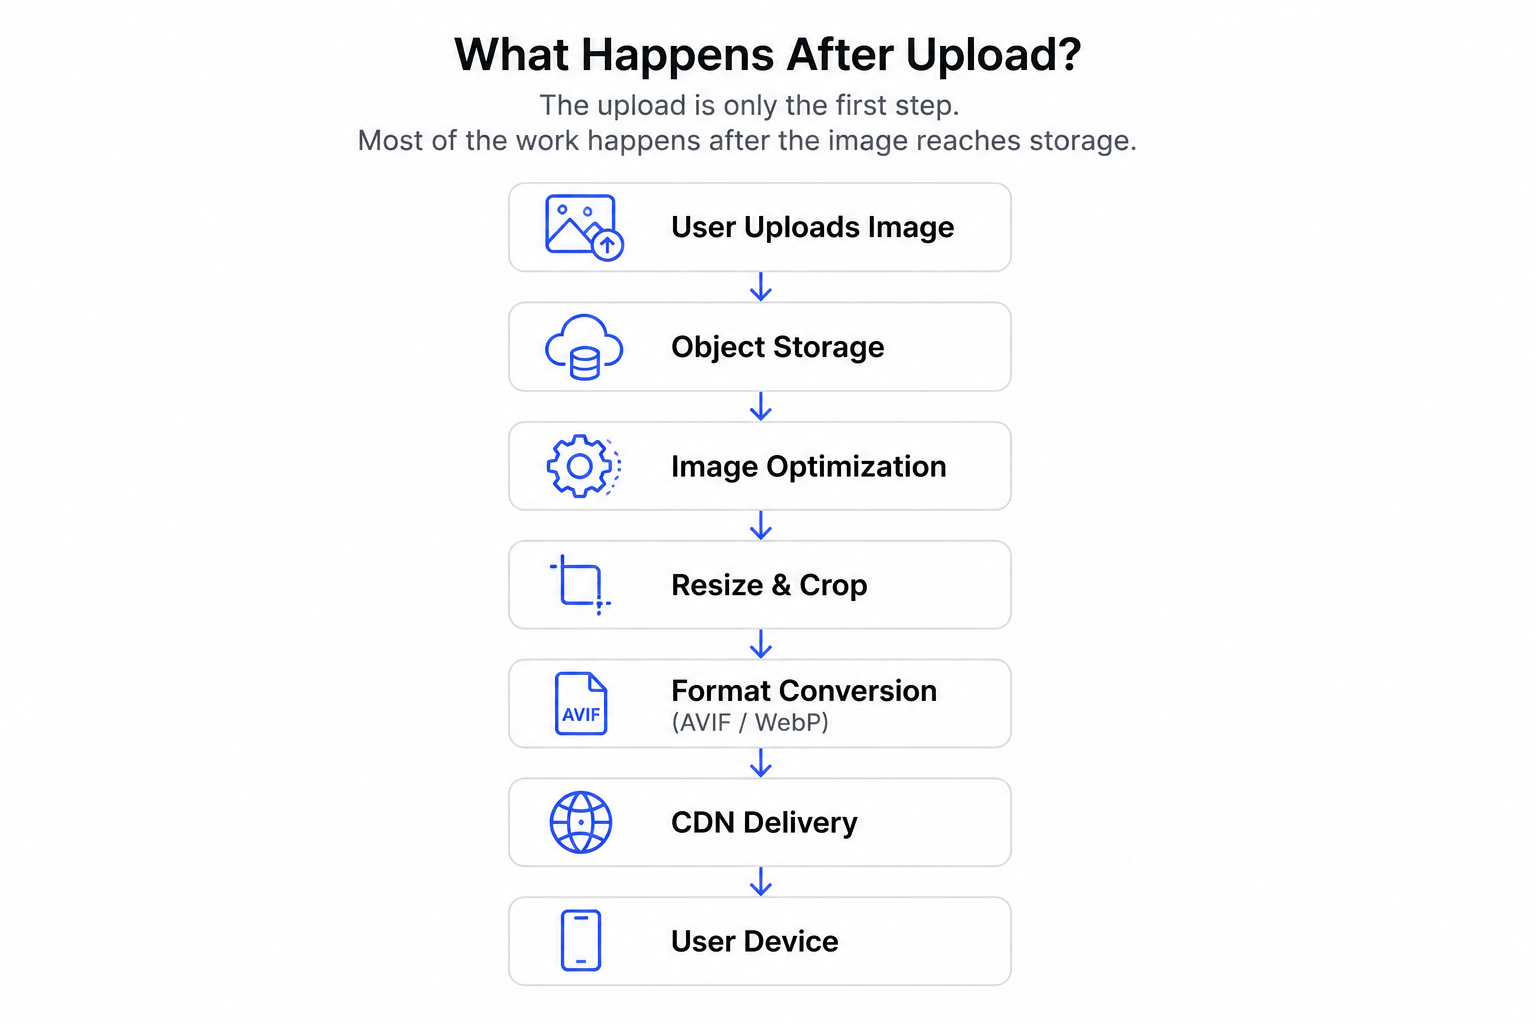
Uploading an image is usually the easy part.
What happens after the upload is where things get interesting.
How do you resize images?
How do you serve different formats to different browsers?
How do you generate thumbnails?
How do you optimize delivery without building an entire image processing pipeline yourself?
If you've built a Next.js application before, you've probably solved the storage problem.
The bigger question is whether you've solved the image pipeline problem.
The article below compares different approaches including native Next.js uploads, Vercel Blob, UploadThing, Uploadcare, and Cloudinary.
I found it useful because it explains not only how to upload files, but also the tradeoffs involved once those files need to be optimized, transformed, and delivered at scale.
The following article was originally shared by the Cloudinary Developer Experience team and is republished here for educational purposes.
Image Uploads in Next.js: Route Handlers, the API-Secret Trap, and What Happens After Upload
You've got an upload box in your Next.js app.
A user picks a file, you POST it to a Route Handler, you write it to storage, you get a URL back.
Looks done.
Then the API-secret trap shows up.
To talk to most storage providers you need a secret, and that secret cannot live in the browser. So now you're writing a server route just to keep credentials off the client.
Fine, that's the right move.
But then a 12-megapixel phone photo lands, your hero image ships 8 MB to mobile, and someone files a ticket because the avatar is rotated sideways on iOS.
Now you need a 200px thumbnail in AVIF, a 1200px hero in WebP, and next/image only optimizes delivery of images you already have. It does not upload anything, and it cannot reach into a third-party bucket and resize what's there.
That's the real question for a Next.js app.
Not "how do I receive the file."
It's "what am I going to do with this image after it lands, and how much of that pipeline do I want to own?"
The Native Next.js Way
The native path is a Route Handler in app/api/.../route.ts plus a place to put the bytes.
There's no upload primitive in Next.js itself, so you reach for object storage.
On Vercel, the cleanest option is @vercel/blob.
Install it
npm install @vercel/blob
Then a Route Handler takes the file and calls put().
The token stays on the server, so the secret never reaches the browser.
// app/api/upload/route.ts

import { put } from '@vercel/blob';

export async function POST(request: Request) {
  const form = await request.formData();
  const file = form.get('file') as File;

  const blob = await put(file.name, file, {
    access: 'public',
    addRandomSuffix: true,
  });

  return Response.json(blob);
}
put() returns an object with a URL you can store.
The other common native pattern is an S3 presigned URL:
- Route Handler signs a short-lived URL
- Browser uploads directly to S3
- App server never touches the file bytes
Both are solid for storing originals.
Here's what neither does:
- Resize
- Compress
- Format negotiation
next/image optimizes images you render through it, but it does not handle uploads and it does not transform files already sitting in your bucket.
If you want a 400px AVIF thumbnail, you're adding Sharp, generating derivatives, storing them, and putting a CDN in front.
That's a pipeline you now own.
The Managed Options
If you want the upload-and-store problem solved without running storage yourself, three managed tools fit a Next.js app well.
Vercel Blob
Managed object storage with the SDK shown above.
Pro Pricing
- Storage: $0.023/GB-month
- Transfer: $0.05/GB
- Advanced operations: $5.00 per million
Free Tier
- 5 GB storage
- 100 GB transfer
- No credit card required
Great for storing and serving originals.
No transform pipeline included.
UploadThing
Built by the create-t3-app crowd.
Features:
- Type-safe
- React-first
- Excellent developer experience
Pricing
- Free tier available
- $10/month for 100 GB
Free Tier
- 2 GB storage
- Unlimited uploads
- Unlimited downloads
Storage product.
Not a transformation pipeline.
Uploadcare
Closest to a full image pipeline.
Features:
- Upload widget
- CDN
- Basic image transforms
Pricing
- Free tier available
- Pro: $66/month
Free Tier
- 1 GB storage
- 5 GB traffic
- Personal use only
Good for uploads plus light transformations.
The Cloudinary Way
Cloudinary treats upload, transform, optimize, and deliver as one product.
In Next.js you access it through next-cloudinary.
Install it
npm install next-cloudinary
For production, use signed uploads.
The secret signs requests on the server and never reaches the browser.
Create a Route Handler:
// app/api/sign-cloudinary-params/route.ts

import { v2 as cloudinary } from 'cloudinary';

cloudinary.config({
  cloud_name: process.env.NEXT_PUBLIC_CLOUDINARY_CLOUD_NAME,
  api_key: process.env.CLOUDINARY_API_KEY,
  api_secret: process.env.CLOUDINARY_API_SECRET,
});

export async function POST(request: Request) {
  const { paramsToSign } = await request.json();

  const signature = cloudinary.utils.api_sign_request(
    paramsToSign,
    process.env.CLOUDINARY_API_SECRET as string
  );

  return Response.json({ signature });
}
This is the heart of the secure pattern.
One Route Handler signs requests and your API secret never reaches the browser.
Client Upload Widget
'use client';

import { CldUploadWidget } from 'next-cloudinary';

export function Uploader() {
  return (
    <CldUploadWidget signatureEndpoint="/api/sign-cloudinary-params">
      {({ open }) => (
        <button onClick={() => open()}>
          Upload an image
        </button>
      )}
    </CldUploadWidget>
  );
}
Rendering Images
import { CldImage } from 'next-cloudinary';

<CldImage
  src="<Public ID>"
  width="400"
  height="400"
  crop="fill"
  gravity="auto"
  alt="User avatar"
/>
The transform becomes a prop instead of an entire pipeline.
Cloudinary automatically applies:
f_autoq_auto
No Sharp functions.
No derivative tables.
No cache invalidation code.
The Comparison
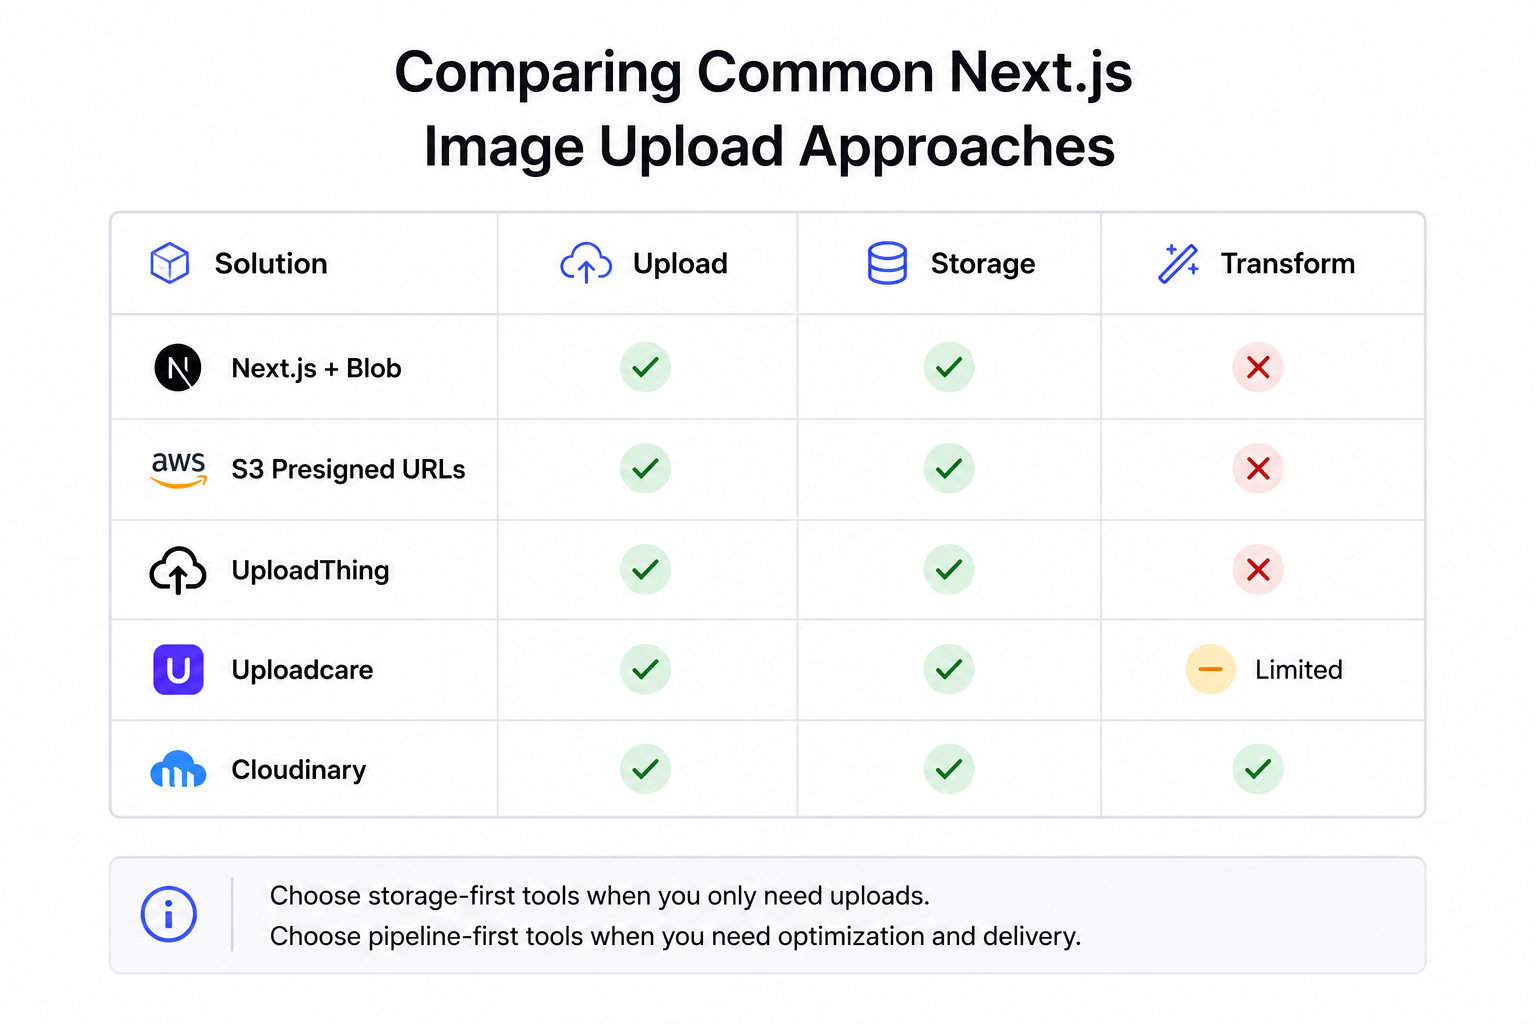
Each solution solves a different problem.
- Next.js + Blob → Store and serve originals
- S3 Presigned URLs → Maximum control
- UploadThing → Great developer experience
- Uploadcare → Uploads with basic transformations
- Cloudinary → Complete upload, optimization, and delivery pipeline
The Honest Part
If your Next.js app only stores an image and serves the exact same file back, you do not need Cloudinary.
Use:
- Vercel Blob
- UploadThing
- Presigned S3 URLs
Whichever is cheapest and simplest.
The mistake is answering the storage question when you actually have the pipeline question.
Why Cloudinary Wins Once You Transform, Optimize, or Deliver
The decision changes the moment:
"Store it"
becomes
"Store it and use it"
Real applications need:
- 200px avatars
- 1200px hero images
- Social cards
- AVIF
- WebP
- Compression
- Edge caching
On the storage-first path, that's an entire project.
On Cloudinary, it's often just:
f_auto,q_auto,w_400,c_fill
Upload once.
Transform on demand.
Optimize automatically.
Deliver globally.
The Free-Tier and Agent Myth-Break
Cloudinary's free plan includes:
- 25 credits/month
- No credit card required
- Free forever
One credit can be used toward:
- 1,000 transformations
- 1 GB storage
- 1 GB bandwidth
The platform also includes tooling designed for AI-assisted development and coding agents.
Start Building
Wire up the Route Handler.
Drop in CldUploadWidget.
Render with CldImage.
The resize, compress, optimize, and delivery pipeline is already handled for you.
Start free and test it on a real Next.js application.
My takeaways
One thing I found interesting while reading this was the distinction between a storage problem and an image pipeline problem.
Most developers think about where images are stored.
Much fewer think about resizing, optimization, delivery, caching, and format conversion until much later.
The biggest lesson for me was that the right solution depends entirely on what you're building.
If you're simply storing user uploads, a storage-first approach may be all you need.
If your application depends heavily on image delivery, optimization, and transformations, the image pipeline becomes just as important as storage itself.
It's a useful reminder that engineering decisions should be driven by requirements rather than trends or tools.